Goal: Get the BLTouch working on my Anycubic 4Max Pro
Part 1 can be found here.
Software Success!
Good news, the software from Poket-Jony worked!
Not sure what I’d done differently to last time but it began compiling through the Arduino IDE with no errors.
After taking a break from trying to get it to work, I re-downloaded the source and it worked.
Initially the plan was to try and use as a reference to make updates to the official Marlin FW branch.
Would love to know why it started working again but not going to complain.
With the FW working it was time to modify the config files to add BLTouch.
Most of the Config file is pretty self-explanatory with good descriptions in the comments (well done to the dev team).
The official documentation here was able to fill most of the remaining gaps.
It’s worth noting that the Poket-Jony version, and the official version aren’t in line so there are some discrepancies between the two.
Firmware Tuning
After an initial program of the printer (also achieved through the Arduino IDE) I gave the homing (G28) and auto level (G29) commands a go.
The first thing I noticed was the z-axis homing behaviour is different to the original.
Previously, the bed would raise up and stop when the limit trip was switched and would remain at the homed z-position.
Now, the nozzle is moved to the middle of the bed, the BLTouch runs through its sensing behaviour, and the bed is lowered to a Z value of 13.00.
This isn’t an issue, it does mean further changes are needed to my start up g-code.
This previously used the homing command to get z to zero for cleaning the nozzle.
The other thing I noticed was several probes (first, sixth and seventh) triggered off the bed holder not the bed itself.
Some adjustments will need to be made to account for this.
Send: G28 Z0 ;move Z to min endstops
Send: M114
Recv: X:180.00 Y:145.00 Z:13.00 E:0.00 Count X:18000 Y:11600 Z:10400
To set the probing area into the correct zone I played around with a few offset values somewhat arbitrarily.
This did get the probe on the bed but wasn’t really up to what I deemed good enough.
One value also got it to run into the right hand side of the machine.
Deciding to solve this “properly” I measured out the bed size, and the nozzle/head movable limits.
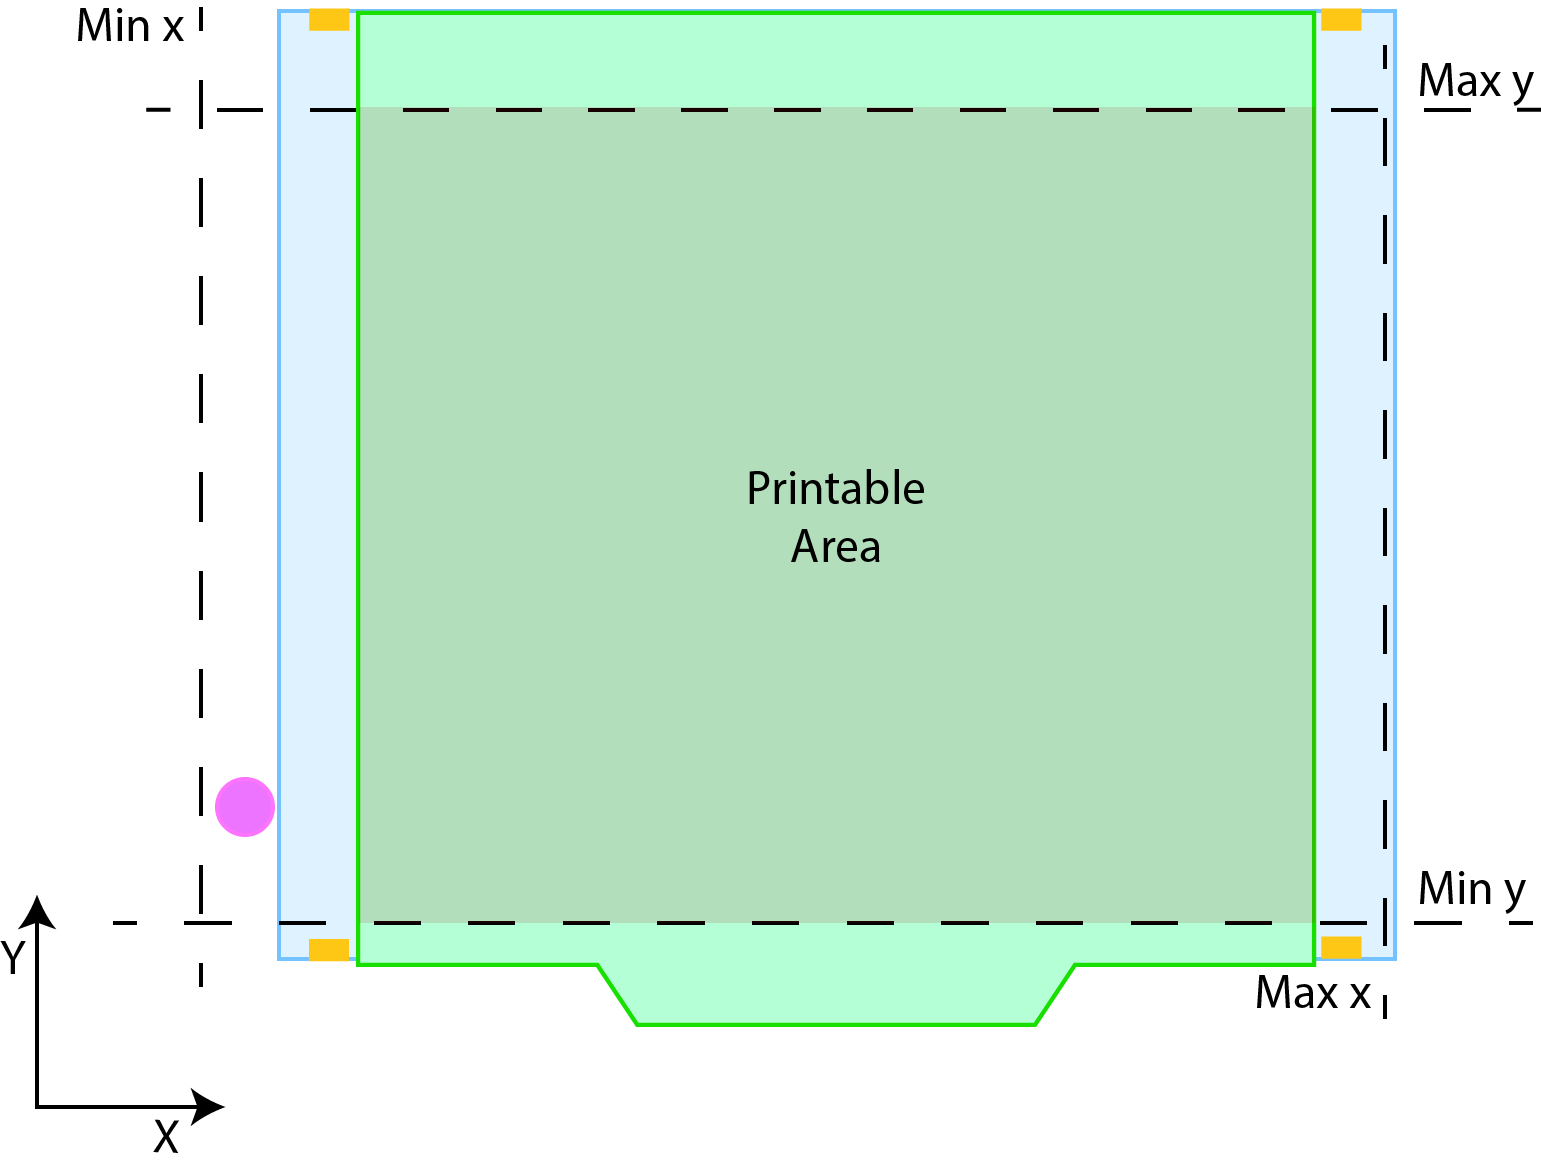
I don’t know if it’s a common trait of 3D printers but the 4Max Pro is not actually able to print on the whole bed (can’t reach the front 15mm, or rear 24mm).
When working through what offsets to use, I needed to take into account the nozzle and BLTouch Probe are offset from each in both x and y.
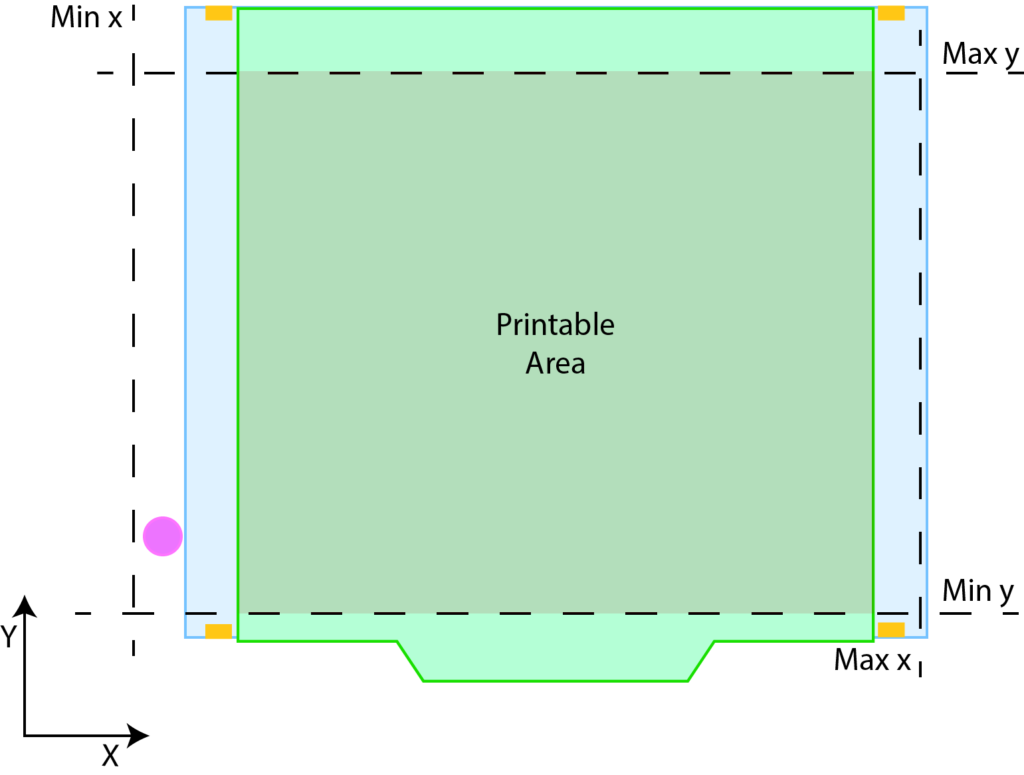
Green is the printer bed, blue it’s holder, orange some proud HW, and purple the nozzle cleaner
Config Changes
The two config files modified are the Configuration.h and the Configuration_adv.h.
I would make some changes, compile, upload, and test it on the printer to make sure they were working as intended.
Some updates were made to please the compiler (Y_BED_SIZE reduced due to limited reachability), and also to maximise probing area (minimum probe limits are based on nozzle coordinate reference frame)
Updates in header files:
///Configuration.h
// @section machine

// The size of the print bed
#define X_BED_SIZE 240
#define Y_BED_SIZE 200 //Limited by Y_MAX_POS

// Travel limits (mm) after homing, corresponding to endstop positions.
#define X_MIN_POS 0
#define Y_MIN_POS 0
#define Z_MIN_POS 0
#define X_MAX_POS 284 // X_BED_SIZE
#define Y_MAX_POS 200 // Y_BED_SIZE
#define Z_MAX_POS 205
///Configuration_adv.h
#define BLTOUCH_SET_5V_MODE //Enabled for V3.0+
/**
* Override MIN_PROBE_EDGE for each side of the build plate
* Useful to get probe points to exact positions on targets or
* to allow leveling to avoid plate clamps on only specific
* sides of the bed. With NOZZLE_AS_PROBE negative values are
* allowed, to permit probing outside the bed.
*
* If you are replacing the prior *_PROBE_BED_POSITION options,
* LEFT and FRONT values in most cases will map directly over
* RIGHT and REAR would be the inverse such as
* (X/Y_BED_SIZE - RIGHT/BACK_PROBE_BED_POSITION)
*
* This will allow all positions to match at compilation, however
* should the probe position be modified with M851XY then the
* probe points will follow. This prevents any change from causing
* the probe to be unable to reach any points.
*/
#if PROBE_SELECTED && !IS_KINEMATIC
#define MIN_PROBE_EDGE_LEFT 25 //MIN_PROBE_EDGE
// #define MIN_PROBE_EDGE_RIGHT MIN_PROBE_EDGE
#define MIN_PROBE_EDGE_FRONT 0 //MIN_PROBE_EDGE, compiler won't take a negative value
// #define MIN_PROBE_EDGE_BACK MIN_PROBE_EDGE
#endifWith the above changes the homing and probing was working well, with some variation.
Some trial runs giving:
Send: G29
Recv: Bilinear Leveling Grid:
Recv:       0      1      2
Recv:  0 +0.127 +0.107 +0.111
Recv:  1 +0.020 +0.014 +0.013
Recv:  2 +0.002 -0.005 +0.049

-----------------------------------

Send: G29
Recv:       0      1      2
Recv:  0 +0.185 +0.111 +0.149
Recv:  1 +0.047 +0.011 +0.034
Recv:  2 +0.066 +0.035 +0.107
Starting code is now looking like:
G90
M82
M106 S0
M140 S60 ; custom bed temp <-- want to ABL with a warm bed
M190 S60 ; custom bed temp
M104 S150 T0 ; custom hot end temp minus 50 degrees
G28 ; home all axes
G29 ; probe ABL
;M420 S1 ; restore ABL mesh
M109 S200 T0 ; custom hot end temp
G21 ;metric values
G90 ;absolute positioning
M82 ;set extruder to absolute mode
M107 ;start with the fan off
G0 X0 Y0 ;move X/Y to min endstops
G0 Z0 ; move to Z 0 height
G1 Y44 F2000 ;wipe nozzle
G0 X0 Y0 ;move X/Y to min endstops
G1 Z15.0 F{speed_travel} ;move the platform down 15mm
G92 E0 ;zero the extruded length
;G1 F200 E3 ;extrude 3mm of feed stock
;G92 E0 ;zero the extruded length again
G1 F{speed_travel}
M117 Printing...
G5
I’m currently running ABL at the start of each print. I may move to saving it and restoring it from memory as confidence builds or, more likely, I become impatient with the slight time increase the probing takes.
Back to Hardware
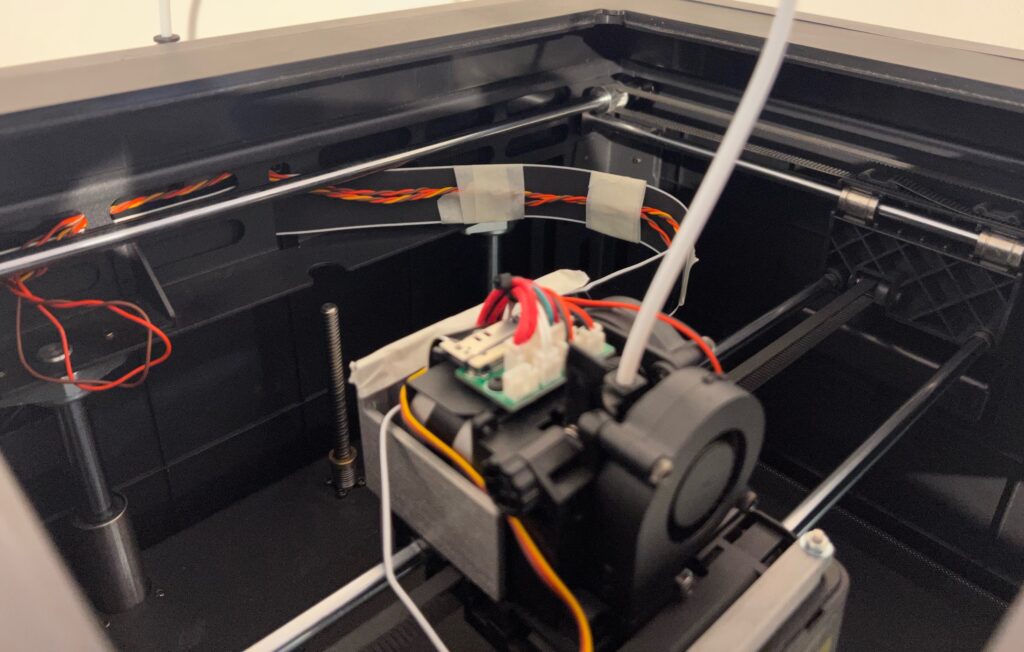
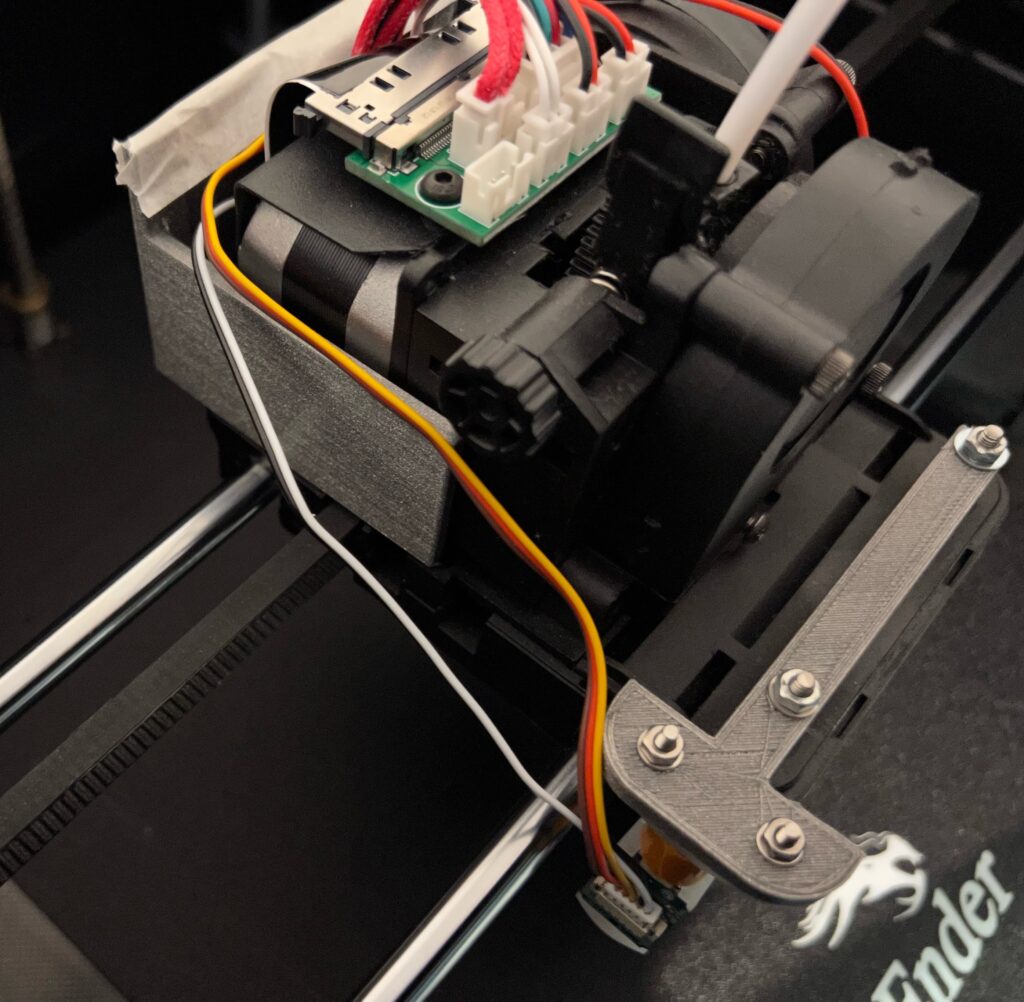
As expected, the wires from the head to the rear of the machine had to be dealt with (snagged when I was lowering the bed).
I was able to pull any unnecessary length into the rear of the machine and applied a temporary solution with masking tape to keep them under control. Initially was thinking cable ties but was worried that they would wear through the original ribbon cable which I don’t want to replace/deal with.
(Update 13/11/2024: I replaced the tape with fabric cable ties which have been working well)
Until next time.
H
Intended starting points for reference software.
https://github.com/Poket-Jony/Marlin-A4MaxPro-2.0.x
https://github.com/MarlinFirmware/Marlin (Specifically version 2.1.2)
Note:
13/11/2024: Updates made to formatting, and words for clarity.

